
What Is 3D Product Modelling? Process, File Formats and What Affects the Price
How a digital twin of your product is built, where it is used and which factors shape the cost. A detailed starting guide for brands commissioning 3D work for the first time.
What is 3D product modelling?
3D product modelling is the process of building a product in three dimensions on a computer, true to its real proportions. The finished model carries the product's size, materials, colours and visible details, so it behaves like a digital twin of the physical item. The same model can be rendered as a photographic still, turned into a video, or published on a website as an object that visitors rotate and zoom.
The main advantage is reuse. Once a product has been modelled, you can produce views from any angle, in any colour option and in any setting without a new studio shoot, new samples or new shipping. The model is an asset: you build it once and use it many times.
It helps to separate two jobs that people often bundle under the name "3D work". The first is modelling, which builds the geometry and surfaces of the product. The second is visualisation, which takes that model and turns it into images or video with lighting and a camera. Both can happen in the same software, for example Blender, but they need different skills and produce different deliverables. When you brief a studio, naming the right one saves a lot of back and forth.
What a digital twin means, and what it does not
"Digital twin" is a broad phrase in marketing. In the context of product modelling it means a visually accurate representation: the shape, the proportions, the feel of the materials, the colours and the visible details match the real product. It does not mean an engineering model.
A CAD model, the kind produced in engineering software and often exchanged as STEP or IGES files, describes how a product is manufactured. It carries exact dimensions, tolerances and the relationships between parts. A visualisation model is built for a different audience: the camera. Its job is to look right from the distances and angles where it will be seen. An internal mechanism, a thread inside a screw or the underside of a part that nobody will ever photograph often does not need to exist in the model at all, and modelling it only adds time.
This leads to the most useful question you can answer before any work starts: where will this model be seen, and how closely? A model made for one hero image on a product page does not need the same level of detail as a model that customers can inspect from every side on a website. The answer decides the amount of work, and it also decides the file you receive at the end.
If you already have CAD files, they are a valuable starting point because the dimensions are reliable. They usually still need to be converted into a lighter, cleaner polygon model before they work well for rendering or the web, since CAD surfaces are not built for real-time display.
Where 3D product models are used
- E-commerce and catalogue images: a whole range shown with consistent lighting and backgrounds.
- Advertising and campaigns: social posts, banners and short product videos.
- Pre-production presentations: showing a product to buyers, investors or distributors before it has been manufactured.
- Colour and material options: letting customers change a finish or colour on the page and see the result.
- Web and augmented reality: a model that can be rotated in the browser or placed in the customer's room.
All of these can share one source model, but each asks for a different output. E-commerce usually needs a handful of fixed angles. Social media needs square and vertical crops. A trade-fair screen needs a looping video. A website needs a lightweight GLB file. Knowing which channel comes first tells you which details matter on day one.
If you are still deciding whether 3D is the right route for your catalogue at all, the comparison in product photography vs 3D render for e-commerce sets out the trade-offs in a practical way.
How the process works, step by step
- Brief and references: dimensions, technical drawings, photographs and any existing 3D files are collected.
- Modelling: the form, the parts and the fine details are built.
- Materials and textures: wood, leather, metal, fabric and other surfaces are matched to the real product.
- Lighting and rendering: studio or environment lighting is set up and the images are produced.
- Revisions: feedback rounds correct colour, angle and detail.
- Delivery: images, video and, if needed, a lightweight 3D model for the web are handed over.
Each stage contains small decisions that shape the whole project, so it is worth walking through them.
Brief and references. This is the stage people underestimate most. If dimensions are missing, the model ends up with the wrong proportions. If every photograph shows the product from the front, the back has to be guessed. A good starter package includes the main dimensions, clear photographs of every side, close-ups of stitching, joints, logos and labels, a technical drawing or CAD file if you have one, and material and colour information. A separate guide covers exactly which inputs to prepare, and the idea is simple: anything the camera will see needs a reference.
Modelling. Large forms come first, small parts after. As with sculpting, if the overall silhouette is wrong, fine detail will not rescue it. The way the geometry is organised matters too. A clean mesh, meaning polygons arranged in sensible flowing lines, lets surfaces look smooth and lets the model be edited later without breaking. Many products are also split into logical parts, such as a frame, a cushion and a handle, so that each part can be given its own material or changed on its own.
Materials and textures. Modern visualisation describes surfaces with physically based rendering, usually shortened to PBR. A handful of properties, such as the base colour, how metallic a surface is and how rough or glossy it is, give believable results under many different lighting conditions. This is also the material model used by glTF, the standard behind GLB files, which is why a well-made material can travel from a still image to a web viewer without being rebuilt from scratch.
Lighting and rendering. The same model can look like a different product when the light changes. A matte black surface, a polished chrome part and a translucent cover rarely look their best under identical light, so the lighting is designed around the character of the product. Work-in-progress images should be shared along the way so that problems with colour, angle or proportion are caught before the final render.
Revisions. Revisions are a normal part of the work, though they should not be open-ended. A clear brief and approval points pull the big changes forward. Changing the shape of a product after modelling is finished is far more expensive than adjusting the light. For that reason it is sensible to approve in sequence: form first, then materials, then lighting.
Delivery. What you receive should be written down at the start: how many images, what resolution, which crops, whether there is a video, whether there is a web model, and whether source files are transferred to you.
What affects the time and the price
No honest studio can give a fixed price without seeing the product, because the factors behind the cost differ from one project to the next. It is more useful to understand the factors themselves:
- Product complexity: number of parts, curved surfaces and mechanical details.
- Available data: a CAD file or technical drawing shortens the work considerably.
- Number of products: products from the same range can share materials and lighting.
- Type of output: a single image, an image set, an animation or an interactive model.
- Resolution and quality: print-quality output takes longer to render.
- Number of revisions: a clear brief at the start reduces them.
The logic behind each factor is straightforward. Complexity adds modelling hours, because every extra part needs its own measurement, material and check. Ready-made data reduces the time spent measuring and guessing. When several products are made together, the shared setup, such as one lighting rig, one material library and one camera layout, is spread across all of them, whereas a single product carries the whole setup cost alone. Output types are separate line items: a still, an animation and a web model each take different effort.
Time follows a similar pattern. What stretches a schedule most is rarely the modelling itself. It is uncertainty: missing references, late feedback, or an output list that changes halfway through. A realistic schedule is therefore drawn up after the brief is clear and includes the approval points.
For a deeper look at how quotes are built, read 3D product modelling cost: what affects the price. If you would rather discuss your own product directly, you can request a quote with a short brief.
Which file formats do you receive?
Images normally arrive as high-resolution PNG or JPG files, often with transparent-background versions. A transparent background helps when you need to place the product in your own page layout or on a banner. Moving content is delivered as MP4. Interactive models for websites are delivered as GLB, prepared to load quickly.
GLB is the binary form of glTF 2.0, an open standard maintained by the Khronos Group. It packs the geometry, the materials and the textures into a single file that browsers and common 3D libraries can read directly. That single-file nature is a large part of why it suits the web. For optimisation, a GLB can use mesh compression such as Draco or Meshopt, and compressed textures, to reduce the download size.
The other formats you may hear about each have a different job:
- FBX: a widely used exchange format for 3D scenes, owned by Autodesk. Common in games and animation pipelines.
- OBJ: an older, simple format for geometry. Materials sit in a separate file, and it does not carry animation.
- USDZ: a packaged version of the USD format, used by Apple devices for augmented reality viewing.
- STEP and IGES: CAD exchange formats. They describe engineering surfaces, not display-ready polygons.
- Blender project file (.blend): the editable source. This is only useful if you or a future supplier plan to work on the model again.
If you want to go deeper into the web format, GLB file format explained for web 3D covers what is inside the file and why it behaves the way it does. And if your plan is to publish the model on your own pages, how to add a 3D model to a website with model-viewer walks through the practical side.
Source files are a separate negotiation. Some projects deliver only the outputs, others also hand over the editable source. Agree this early, so that you are not surprised later when you want to add a new colour and discover you have no file to add it to. Usage rights should also be put in writing at the start, covering where and for how long you may use the images and the model.
Common mistakes and what to watch for
A few mistakes appear again and again with brands that are new to 3D, and knowing them in advance helps:
- Relying on a single reference photograph. Whatever the photo does not show has to be guessed.
- Leaving the output list until the end. "Model first, decide later" turns tasks such as optimising for the web into extra work.
- Approving colour on a screen. Screens differ, so for important colours a physical sample or a coded reference, such as a fabric swatch or a paint code, is safer.
- Expecting excessive detail. Every screw and stitch can be modelled, but detail the camera will never see only adds cost.
- Comparing quotes by the total alone. The same figure can sit on top of very different scopes.
On the last point, the practical fix is to ask every supplier to answer the same questions: how many products, how many images and crops, what resolution, whether there is a web model, how many revision rounds are included, and whether the source files are included. Put the answers side by side and the quotes become comparable.
A short checklist before you start
Writing down the answers to these questions makes the first conversation and the quote far more productive:
- Where will the model be used: website, catalogue, social media, trade fair, web 3D?
- How many products are there, and how many colour or material options?
- Do you have technical drawings, CAD files or a dimension table?
- Can the supplier get access to a physical sample of the product?
- Do you have required crops, resolutions or brand guidelines for the outputs?
- Might you add new colours or new products later?
The last question matters because it affects how the model is built. If colour options are likely to be added, the materials are set up separately and kept editable from the beginning, and then a new colour is a small task instead of a rebuild.
A hypothetical example
Imagine a furniture brand with one armchair and four fabric options. This is an invented scenario, used only to show how the decisions connect. The brand wants catalogue images now and may want a web viewer next year.
Because the web viewer is a possibility, the chair is modelled with separate parts for the frame, the seat cushion and the legs, and each fabric is a separate material. The model is kept at a sensible level of detail rather than modelling every hidden seam. The catalogue images are rendered from that model with a shared studio lighting setup. A year later, building the web version is a matter of preparing a lighter GLB from the same source, and adding a fifth fabric means creating one more material. Nothing has to be rebuilt, which is exactly the reuse that makes modelling worthwhile.
A real example: Aura Reformer
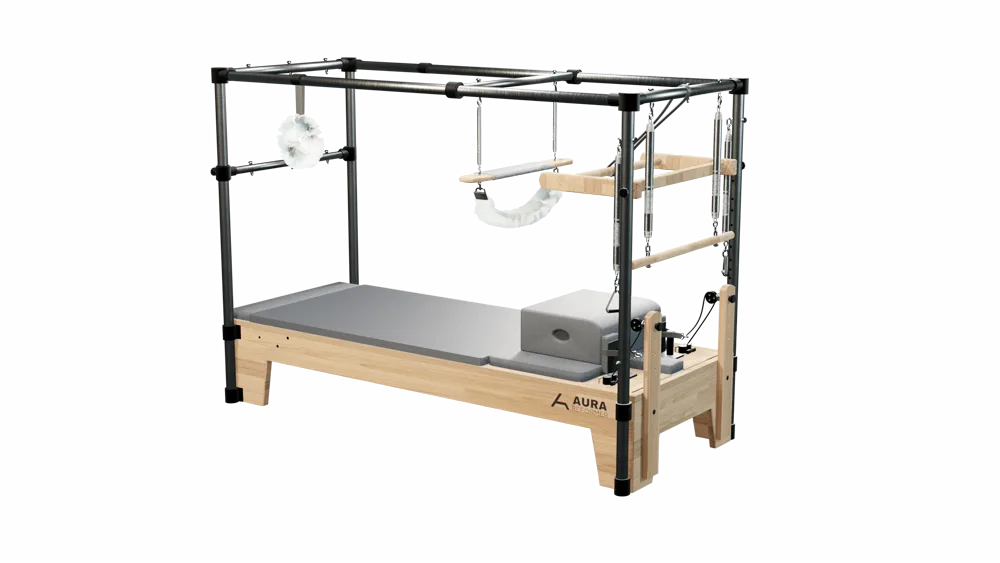
For Aura Reformer, a Pilates equipment brand, I modelled a set of six products. Each one is shown in a web viewer, and a 3D colour picker lets visitors change the upholstery. The picker offers 57 colours in total: 20 from the Aspendos range, 29 from the Harşena range and 8 Toskanto felt options.
The example illustrates the idea from the beginning of this article. The products were built as models rather than as individual pictures, so the same structure supports both still visuals and the interactive experience. You can see the result on the Aura Reformer project page, and the thinking behind the picker is explained in 3D colour configurator for products: the Aura Reformer case.
Frequently asked questions
Do I need to have the physical product to commission a 3D model?
Not always. A model can be built from technical drawings, dimensions and reference photographs. A physical sample is very helpful for checking materials and colours, so it is worth offering one if you can.
Can one model produce both images and video?
Yes. Once the model exists, image sets, a promotional video and an interactive web model can all come from the same source. Each output still needs its own crops, lighting and file preparation.
How long does a project take?
It depends on the complexity of the product and the number of outputs. A reliable schedule can only be set once the brief and references are clear, and it should include the approval points.
Is a 3D model the same as a CAD model?
No. A CAD model carries dimensions and tolerances for manufacturing and engineering. A visualisation model is built so that the surfaces the camera sees look correct. If you have CAD data it is a valuable starting point, but it normally has to be reworked before it suits rendering or the web.
Can I add new colours to the model later?
Yes, provided the materials were set up as separate, editable items from the start. If new colours or finishes are likely, say so in the brief.
Conclusion
3D product modelling turns a product from a one-off picture into a reusable asset. When you begin with good reference data, a clear output list and approvals in a sensible order, the process becomes predictable and efficient. Settle the scope and the outputs first, then decide. If you would like to talk about what suits your product, you can request a quote and send a short brief.
Have a product in mind? Send photos, dimensions or drawings and get a project quote.
Request a quote